
Plunet BusinessManager, often referred to as Plunet, is the business management system offered by Plunet GmbH (https://www.plunet.com/). It is available in hosted and installed versions as well. BeLazy offers a very deep, stateful, detail-oriented integration with Plunet that was developed together with Plunet's engineers.
Requirements:
Please refer to the article about Preparing Plunet for connecting to BeLazy.
Expected URL format:
The URL is https://company.plunet.com.
Configuration:
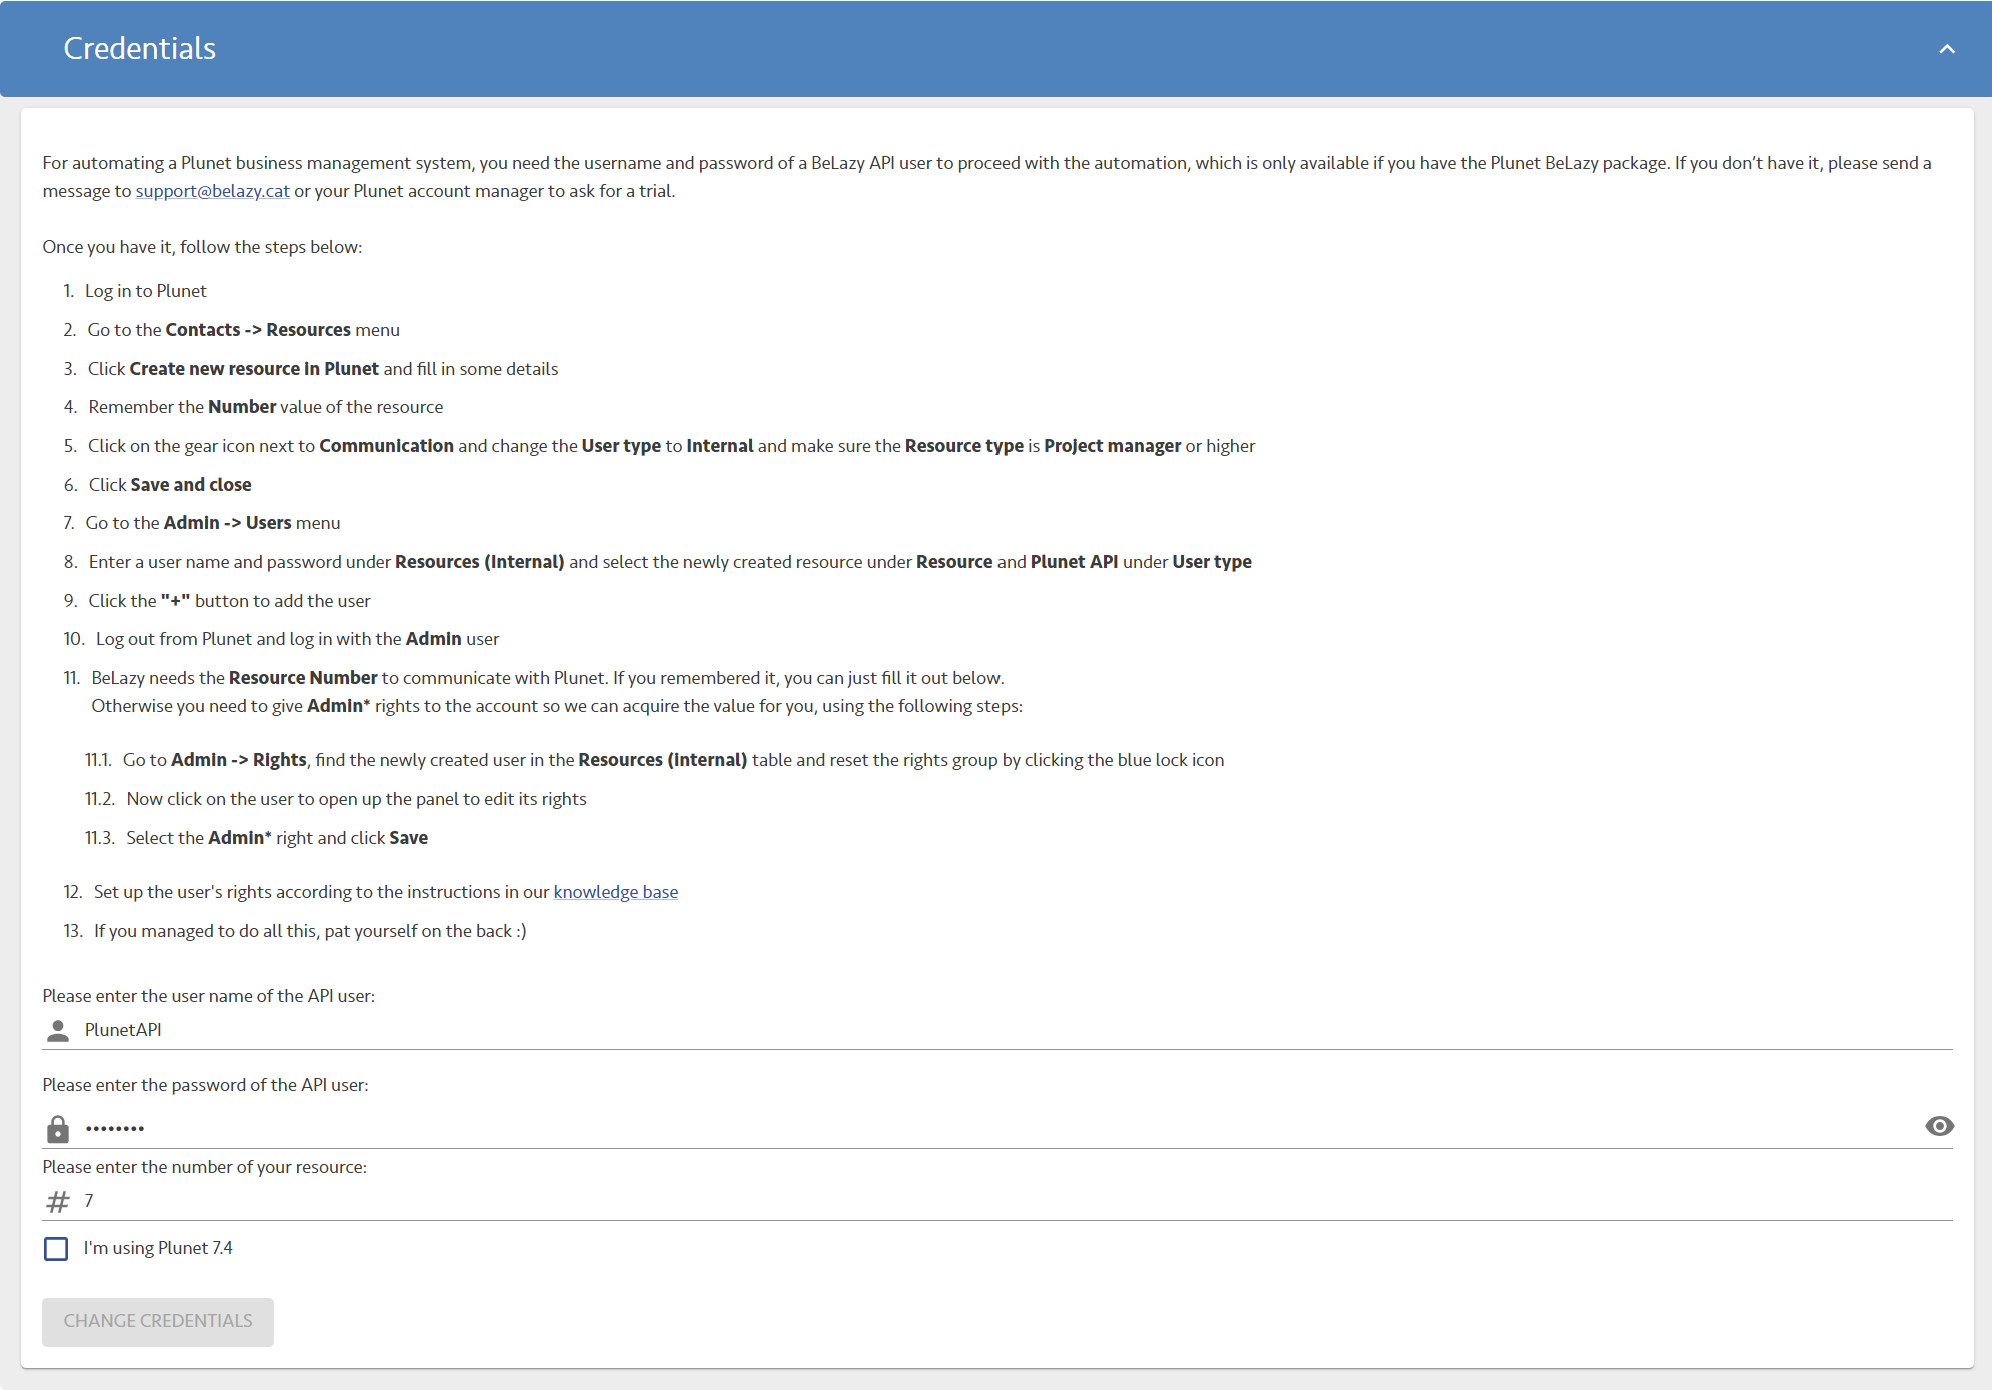
- In the Credentials section, you need to enter the user name and password of an API user. The onboarding process gives you more information.
- You need to enter the number of your resource associated to the API user, which you get during preparation. You can leave this empty, but then the admin rights must be enabled for the API user.
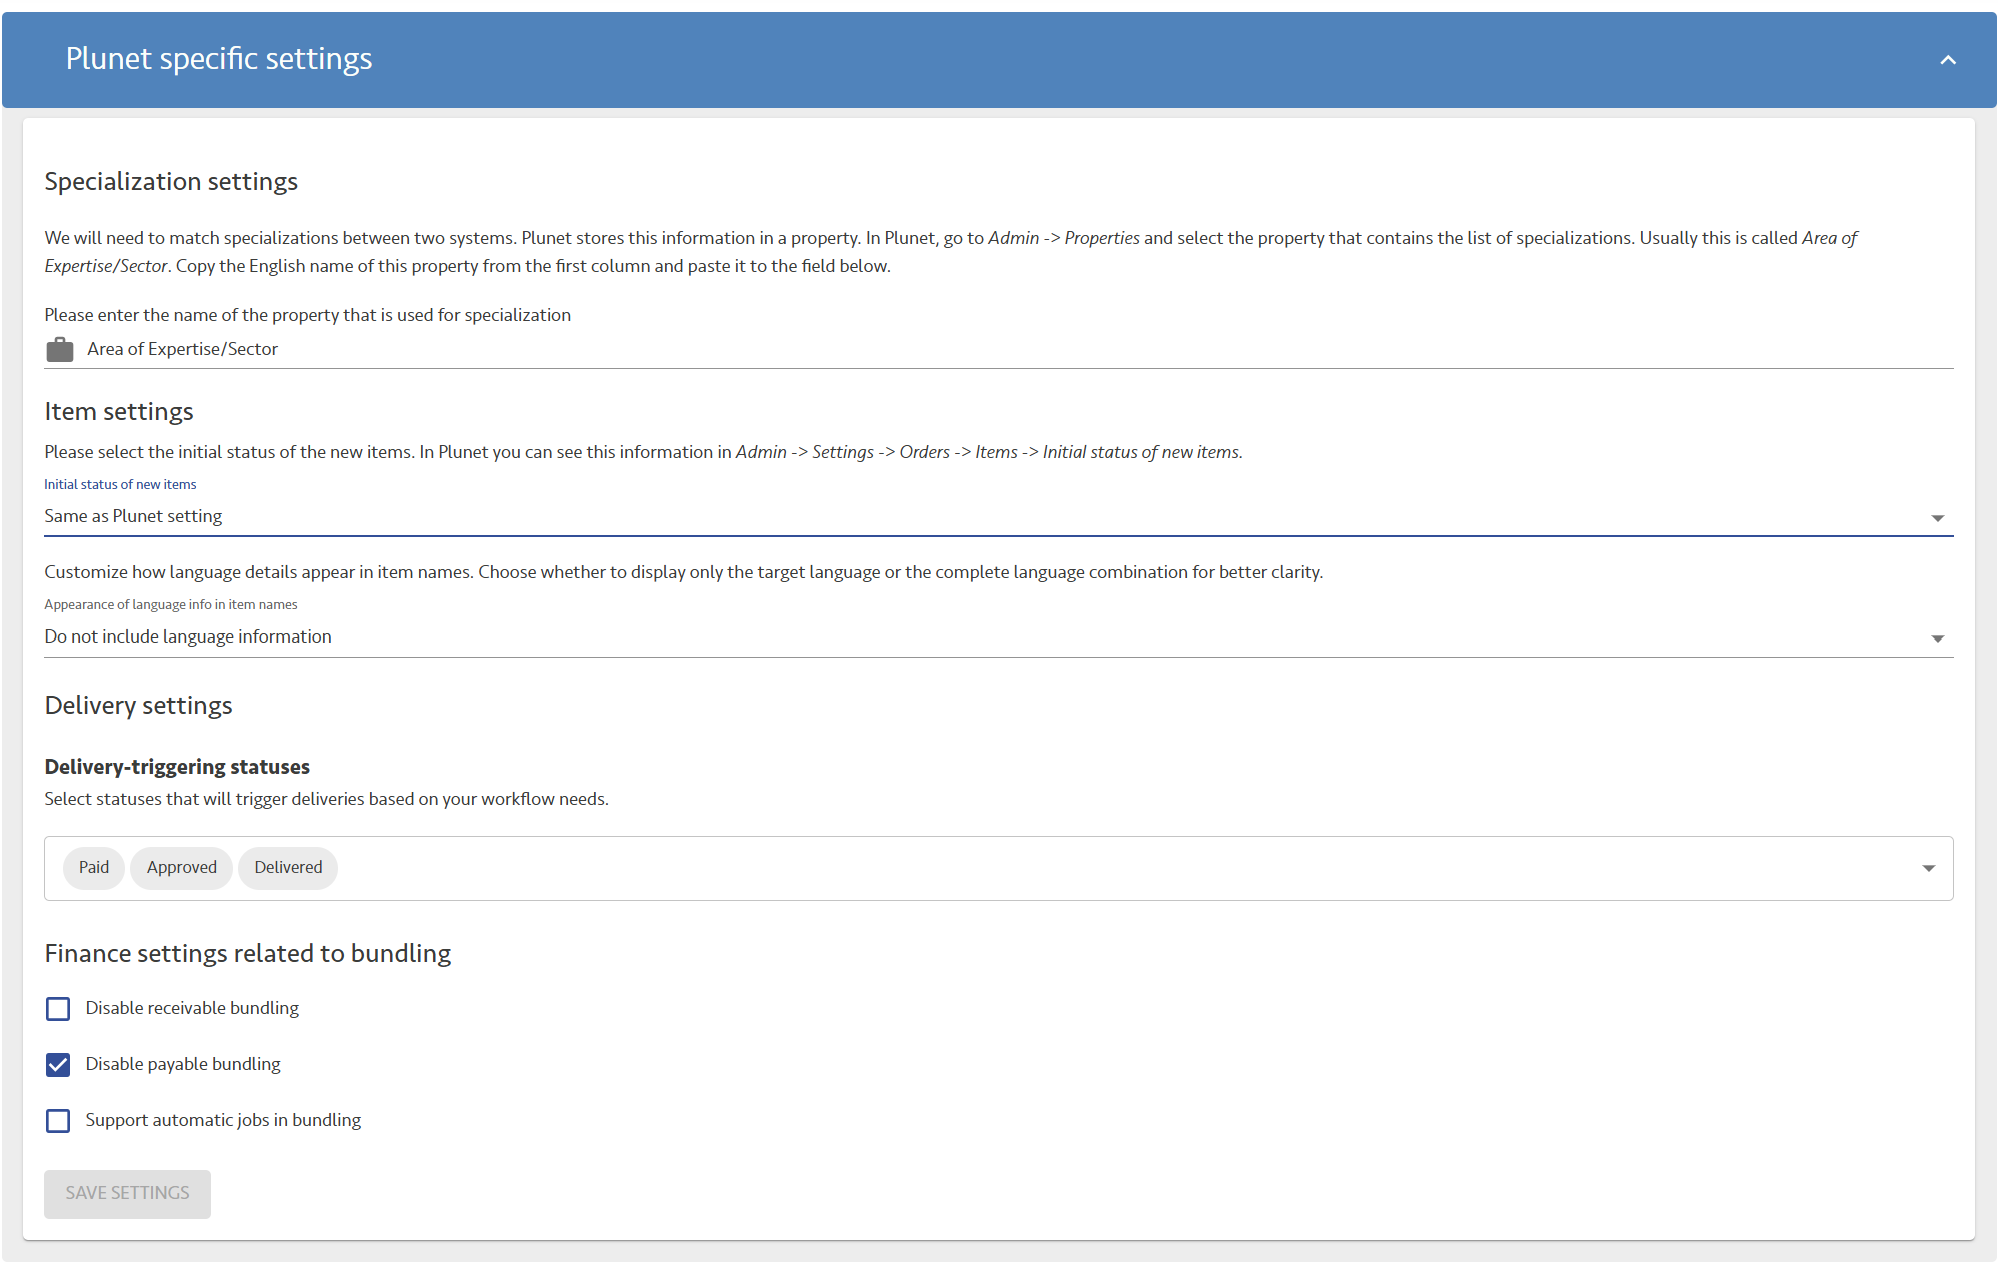
- In the Plunet specific settings section, you enter information that guides BeLazy on how to respond to specific Plunet events. As Plunet is fully customizable with properties, but BeLazy requires a specialization property, you need to enter the name of the property that holds the specialization/area of expertise. You already configured this in the preparation step.
- Plunet uses statuses for items and jobs. For items, there is a configuration in Plunet what the status of new items should be. However, sometimes you may want to easily see BeLazy-created items. In this case you can select the Initial status of new items from the drop-down list. This will be the status of BeLazy-created items, no matter the Plunet configuration.
- Some customers want item names to include the target language or the language combination. It is not a must, but in the item listing this information may not be readily visible otherwise. Under Appearence of language info in item names, you can control this behavior, if item names should carry language codes or not. Otherwise item names are fully customizable in the Instruction mapping of each connection.
- The Delivery-triggering statuses of jobs decide which statuses of jobs you consider ready for delivery back in the origin system. For example, you may want to add Without invoice, which by default is not triggering delivery and closing of the completed work in the customer's system.
- Finally, some Finance settings related to bundling: bundling merges multiple pieces of work into one item or one job. If each of them have an analysis, if you disable the receivable or payable bundling, you may have multiple price lines of the same bracket. For example, if you merged two jobs, you will most probably have two Word(s) translation no match price lines, with different word counts. If you want to instead have a single price line for the two jobs, with the word count added up, enable the receivable or payable bundling. Please note that the options say disable. If you disable receivable/payable bundling, you'll have multiple price lines.
- Support automatic jobs in bundling allows you to use bundling even if you use the AutomationManager and your first job is an automatic job.
- The actual connection configuration goes through each and every step that maps data from the origin system to Plunet.
Functionality supported:
- All known quote and order creation scenarios are supported
- Linguist mapping and reassignment between systems are supported
- File download and delivery supported
- Job closing and delivery supported in both directions
- Project bundling supported
Functionality not supported:
- Quote to order transformation cannot be automated because Plunet's APIs do not enable that
- Files above 3 GB are not handled
Useful information: Full automation - file deliveries by PMs:
In order for Plunet to be able to deliver files back to the vendor portals / translation management systems, BeLazy picks up the files from the item's last delivered jobs. Even though you should set the item's status to "Can be delivered", do not upload files to the item's folder, but rather look at the last job in the workflow, make sure its status is delivered, and upload the files there into the target folder. The following screenshot shows where you need to click to open the target files.
