The Google Sheets integration gives you a live spreadsheet view of everything BeLazy is monitoring: projects, jobs, volumes, money, deadlines and analysis data. It is not only a report. From the same spreadsheet you can pick a vendor for a job, calculate what that vendor will cost you, change a deadline and close a job, and BeLazy will carry those changes back into your TMS or BMS.
You can also use the spreadsheet for custom reporting, and to create custom views with a limited set of data that you share with users who should not see everything in the master spreadsheet.
This article covers the setup: what you need, connecting your Google account, creating the spreadsheet, sharing it with your team, and the one-time configuration inside the file.
Before you start
You need three things:
- A Google account. The spreadsheet is created in the Google Drive of the account you connect, and that account becomes its owner. If your team should work in the spreadsheet together, connect an account the team can keep long-term. A shared company account is usually a better choice than a personal one.
- The Google Apps Script API turned on for that account. BeLazy installs scripts into the spreadsheet (the Translation tools menu, the side panel, vendor selection). Without this setting, Google refuses the installation. Open https://script.google.com/home/usersettings and switch Google Apps Script API to On.
- One Google account per browser profile. Google has a long-standing problem with scripts in spreadsheets when several Google accounts are signed in to the same browser: menus may not appear, or actions fail with permission errors. If you use several accounts, open the spreadsheet in a separate browser profile, or in an incognito window with only the right account signed in.
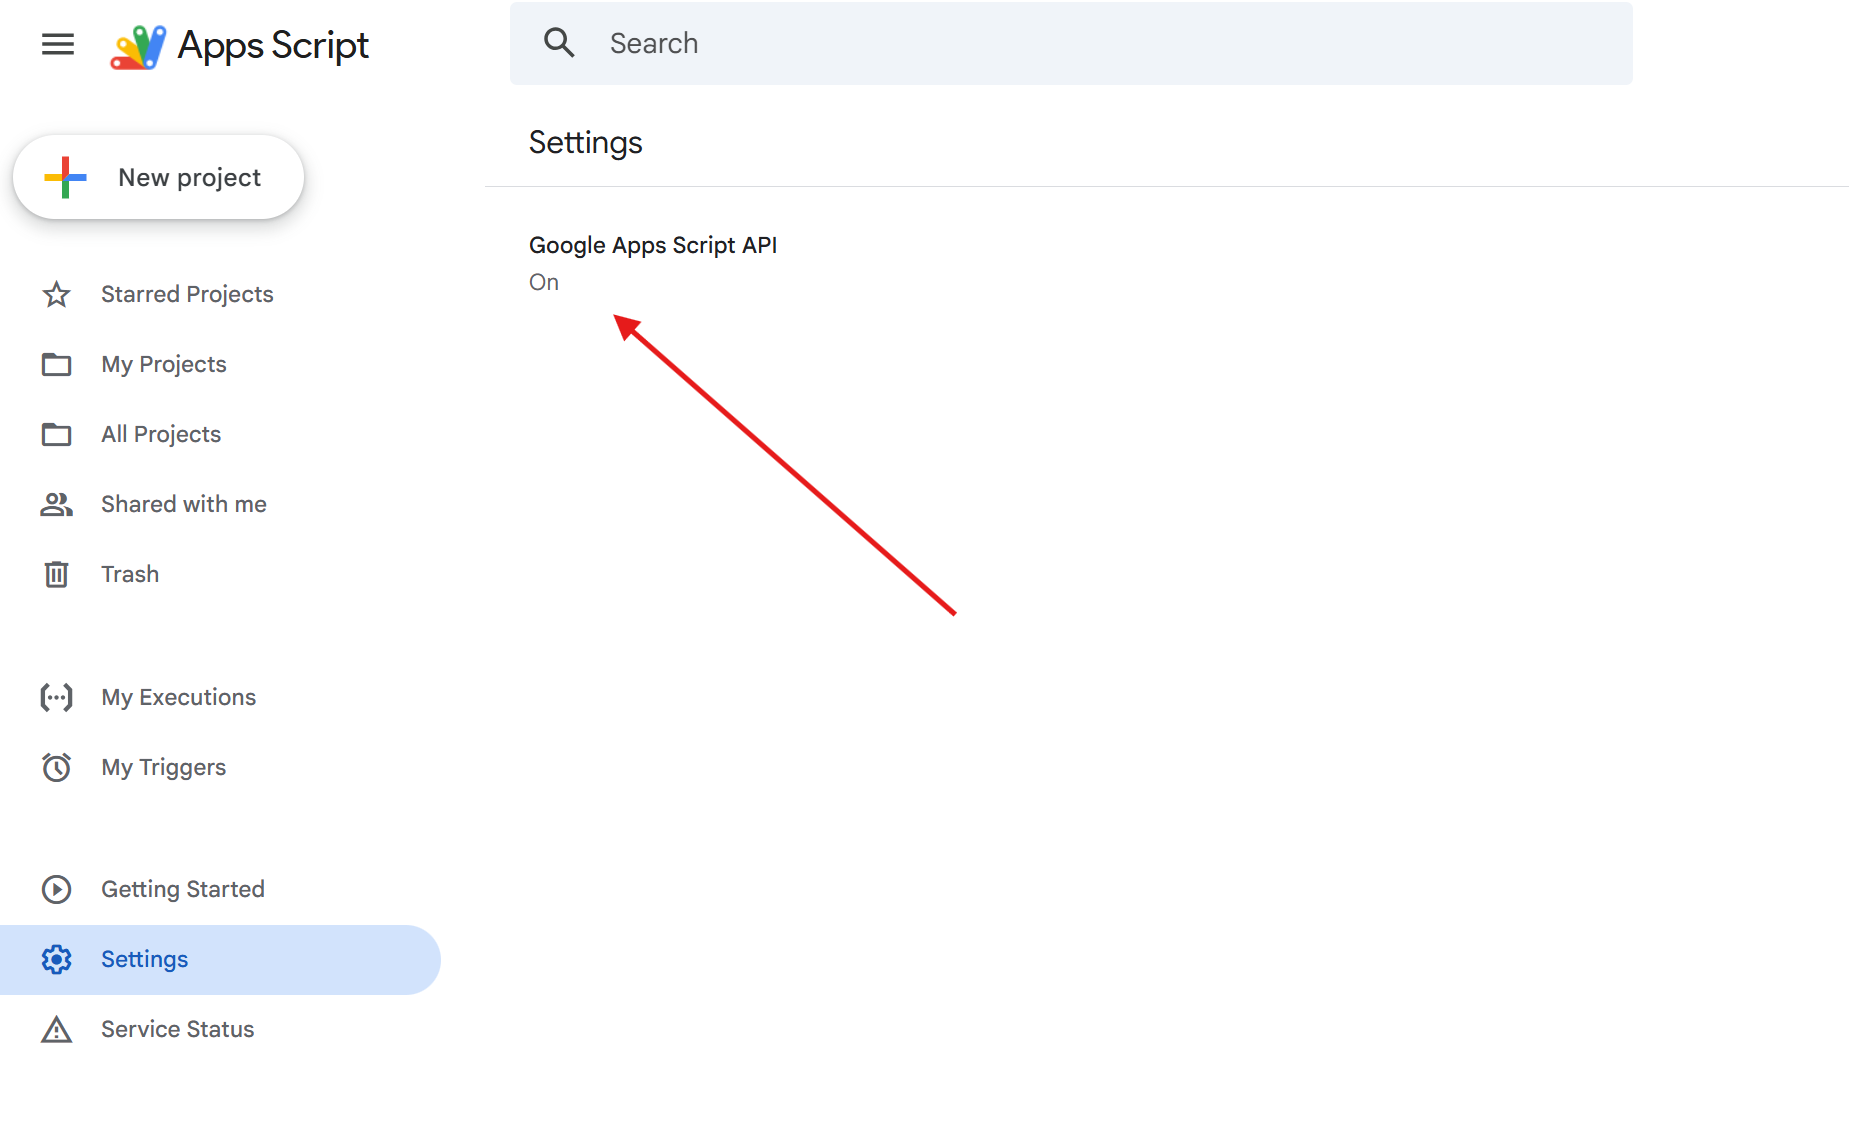
Warning: Turn on the Apps Script API before connecting, not after. Connecting with the Apps Script API disabled produces a spreadsheet without the Translation tools menu.
Connect your Google account
- In BeLazy, open Settings > Google Sheets Integration.
- Click Connect to Google account.
- A Google sign-in window opens. Choose the account and accept the requested permissions. BeLazy asks only for access to the files it creates itself, so it cannot see the rest of your Drive.
- When the window closes, the settings page shows Connected as: your@email.

Sign out from Google at the bottom of the section disconnects the integration. The spreadsheet itself stays in your Drive, it simply stops being updated.
Create the spreadsheet
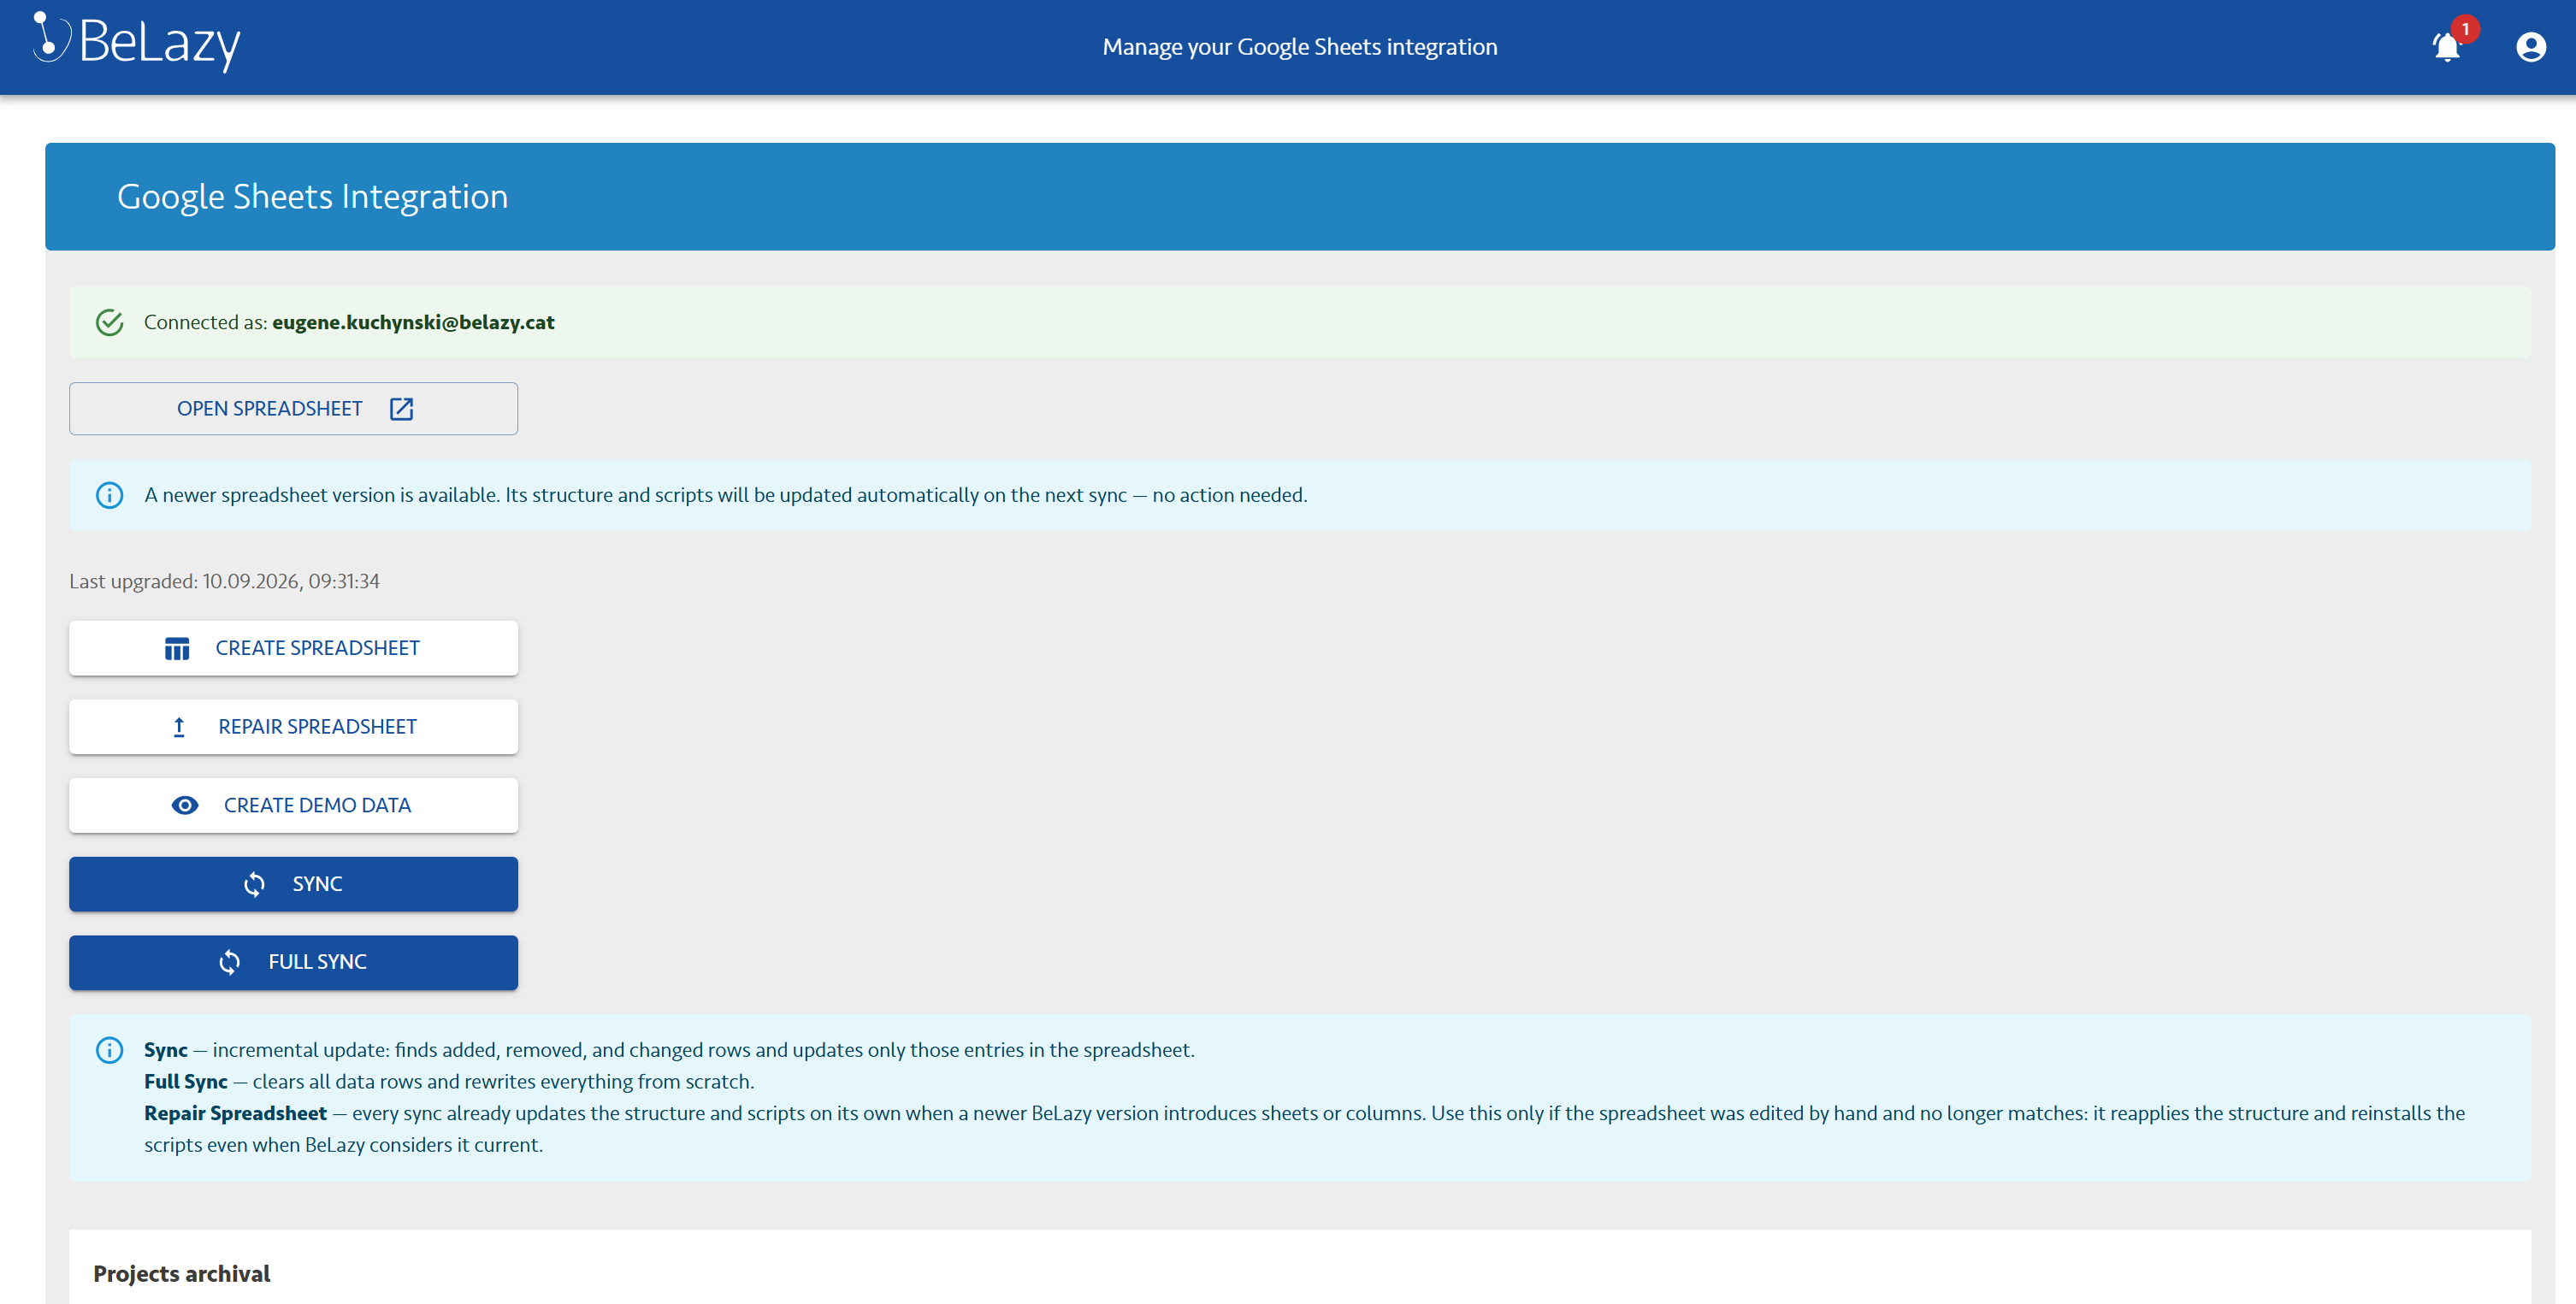
Click Create Spreadsheet. BeLazy will:
- create a new spreadsheet in the Drive of the connected account, named BeLazy - <your organization> - Project Management;
- build all sheets, headers, colours, number formats and dropdowns;
- install the scripts (the Translation tools menu, the side panel, the dialogs);
- run a first synchronization and fill the sheets with your live data.
This takes a while on a large account. The button shows the current step while it runs. When it is finished, an Open Spreadsheet button appears.
Create Demo Data fills the spreadsheet with a small set of invented projects, jobs, vendors, price lists and analysis rows, so you can try the features without touching real data. It replaces the data currently in the sheets; the next synchronization puts your real data back.
Warning: Pressing Create Spreadsheet again creates a second spreadsheet and points BeLazy at the new one. The old file stays in your Drive but is no longer updated, and everything you typed into it by hand (price lists, fuzzy schemes, vendor capabilities) stays behind in the old file. Use it only when you really want to start over.
Find and share the spreadsheet on Google Drive
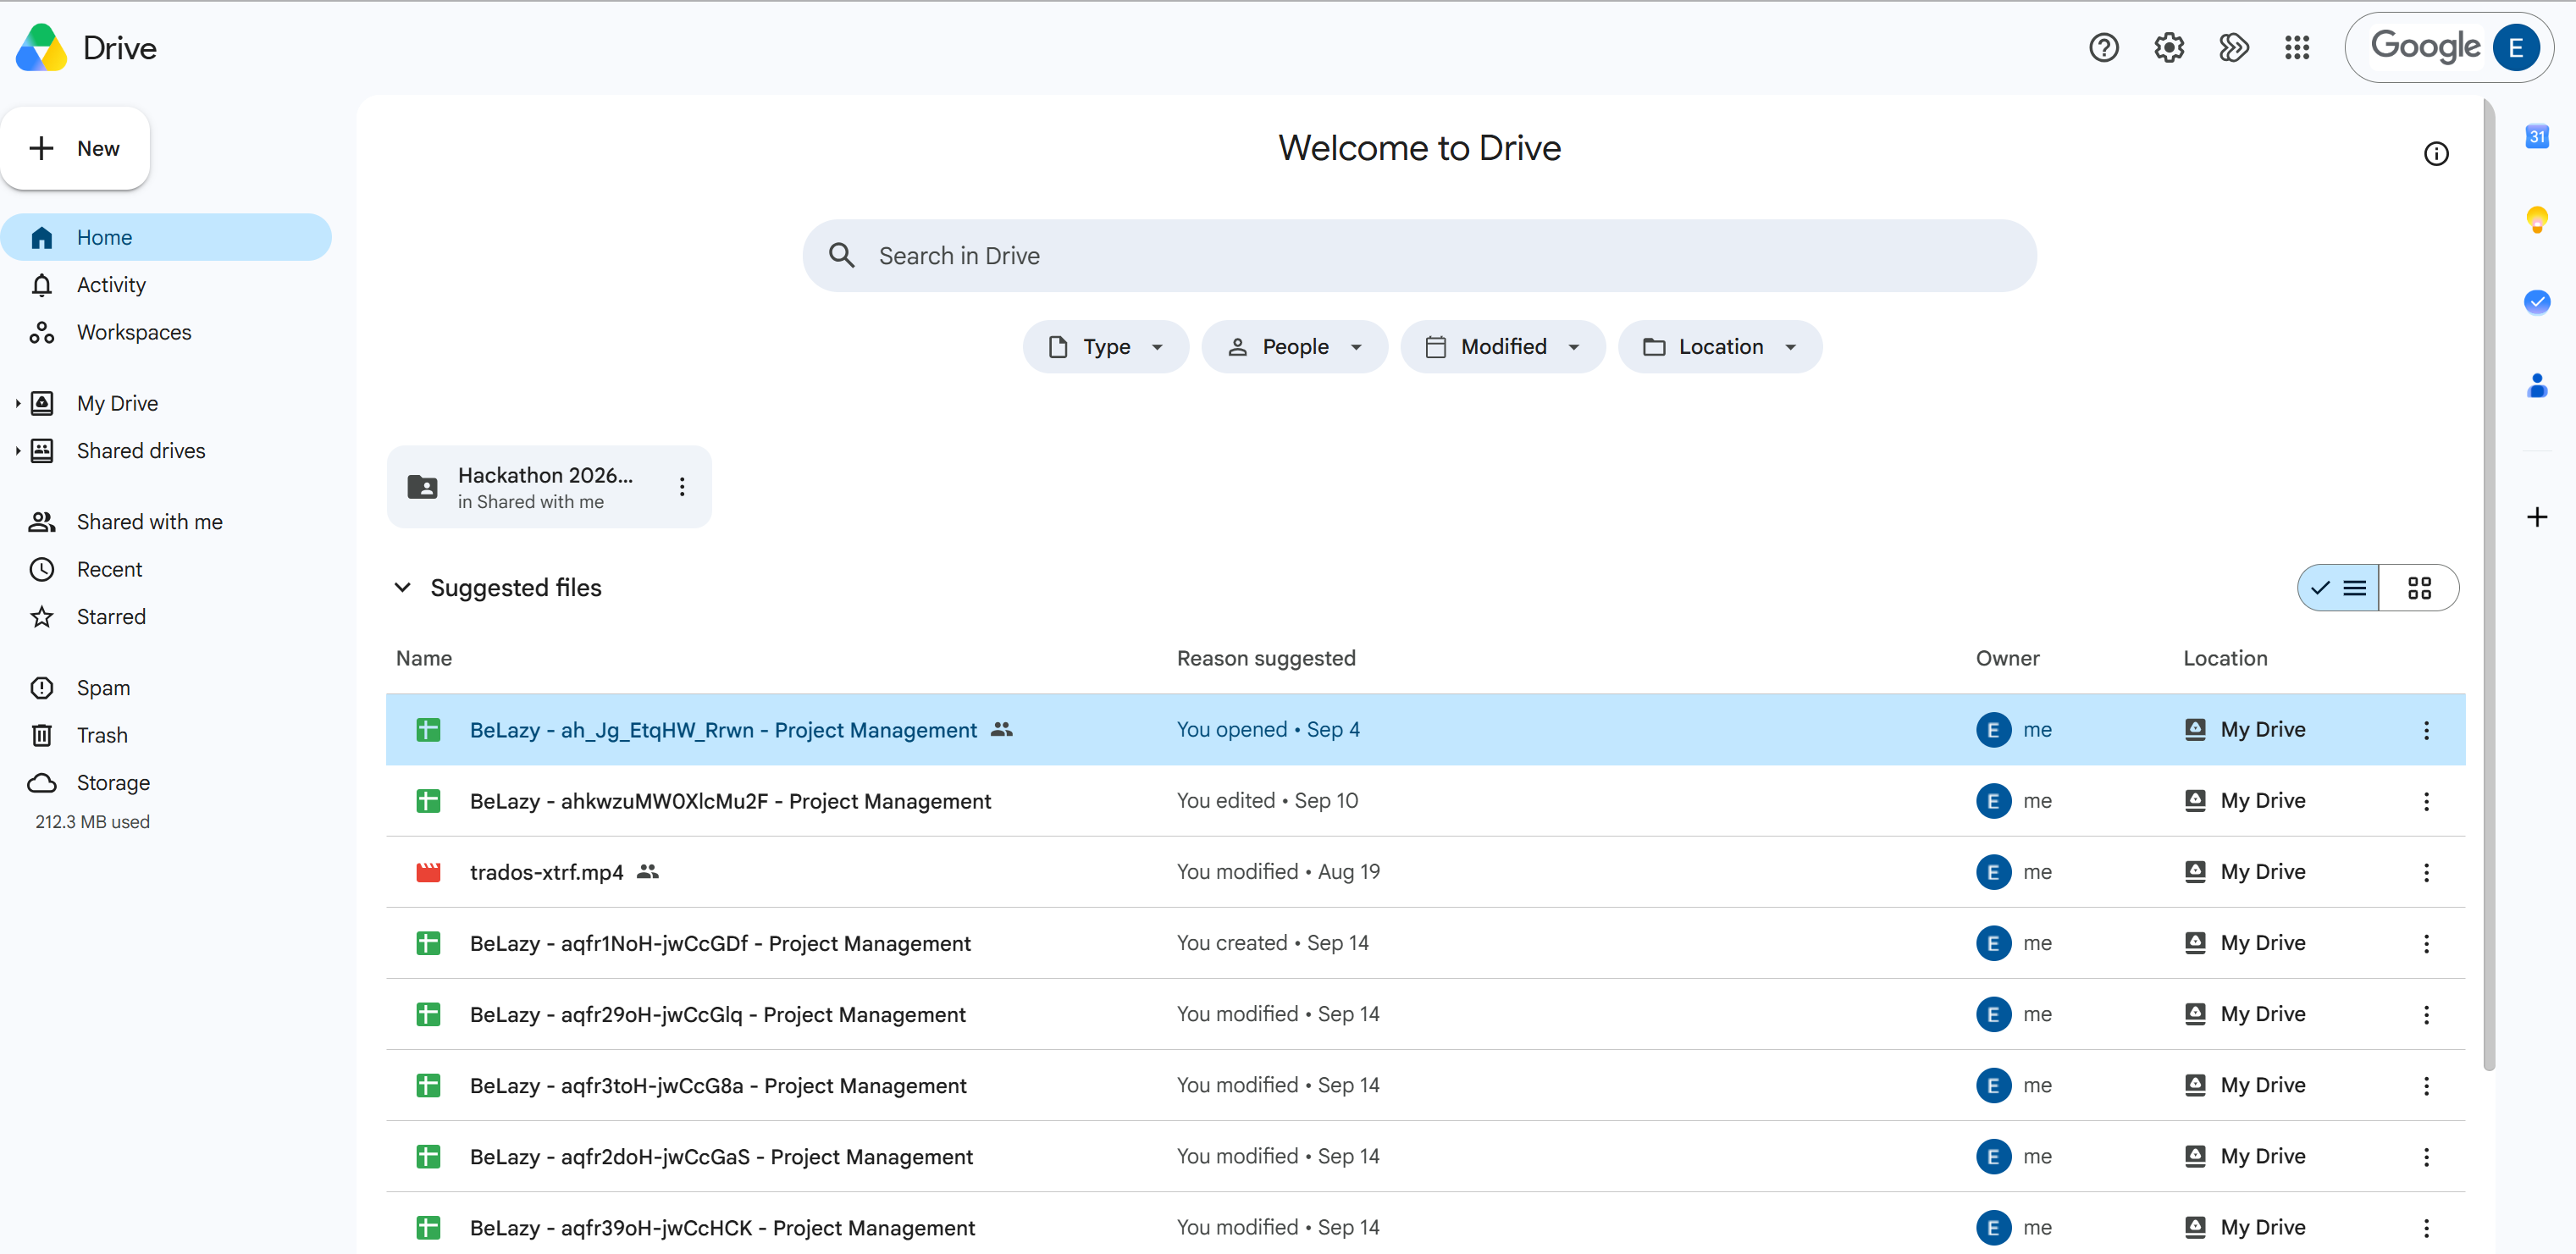
The easiest way is the Open Spreadsheet button in BeLazy, which always points at the current file.
To find it directly:
- Go to https://drive.google.com signed in as the connected account.
- The file is in My Drive (the root folder), named BeLazy - <your organization> - Project Management.
- Or type BeLazy into the Drive search box.
You can move the file into any folder and you can rename it: BeLazy addresses it by its internal ID, not by name or location. If you rename it, you lose the hint about which organization it belongs to, so it is usually better to keep the name.
To let colleagues use it, share it the normal Google way: Share, add their Google addresses, give them Editor rights. A few things to know:
- Everyone who should change vendors, deadlines or statuses needs Editor rights.
- The first time a colleague uses the Translation tools menu, Google asks them to authorize the scripts. That is a normal Google consent screen, and it must be accepted once per user.
- The one-time setup below (triggers, multi-select columns) is done once per spreadsheet, not once per user.
One-time setup inside the spreadsheet
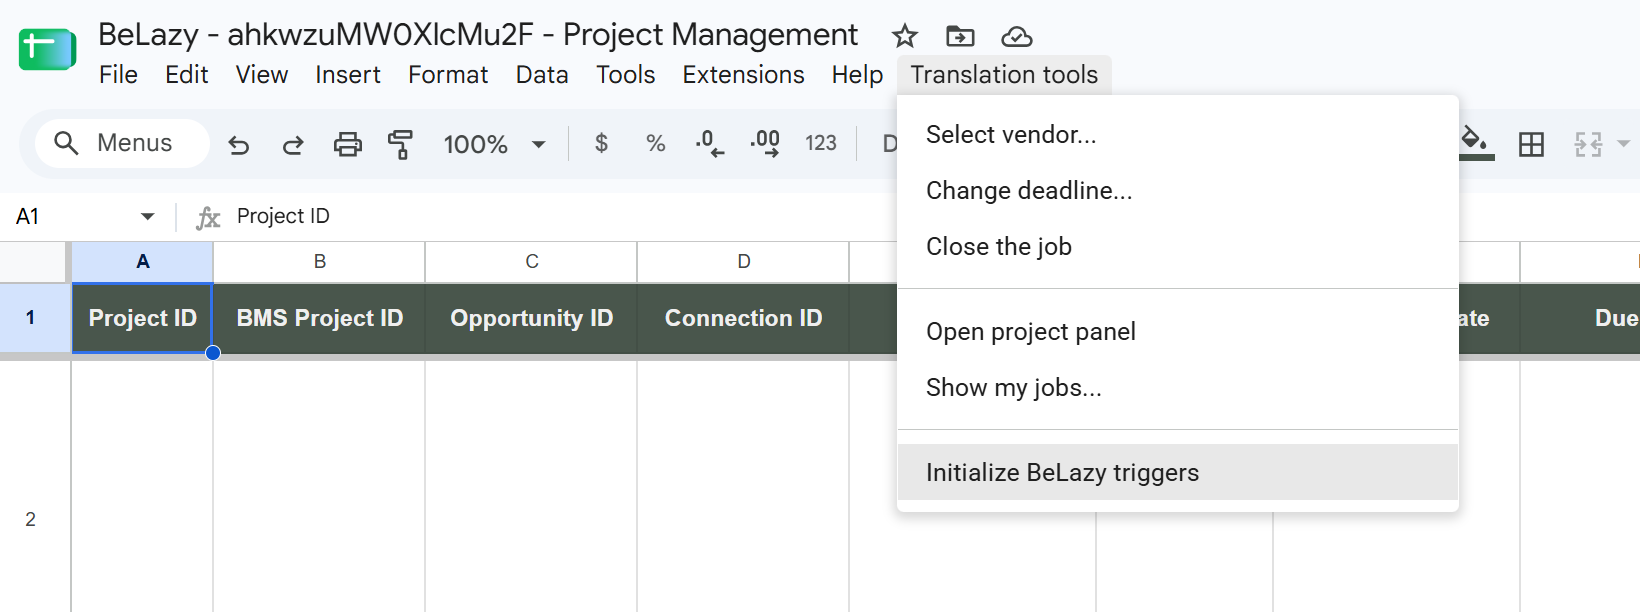
Open the spreadsheet. You will see a Translation tools menu next to Help. If it is missing, wait a few seconds and reload the page, because Google builds custom menus after the file is open.
Initialize the triggers
Choose Translation tools > Initialize BeLazy triggers, then confirm the Google authorization prompt. You should get a "BeLazy triggers have been initialized successfully" message.
This installs the trigger that watches the Jobs sheet and sends your edits to BeLazy. Without it, changing Vendor, Due date or Status in the Jobs sheet changes only the cell: the data will not reach BeLazy or your TMS.
Run this once per spreadsheet. It survives closing the file, and it also applies to edits made by your colleagues.
Turn on multi-selection for a few columns
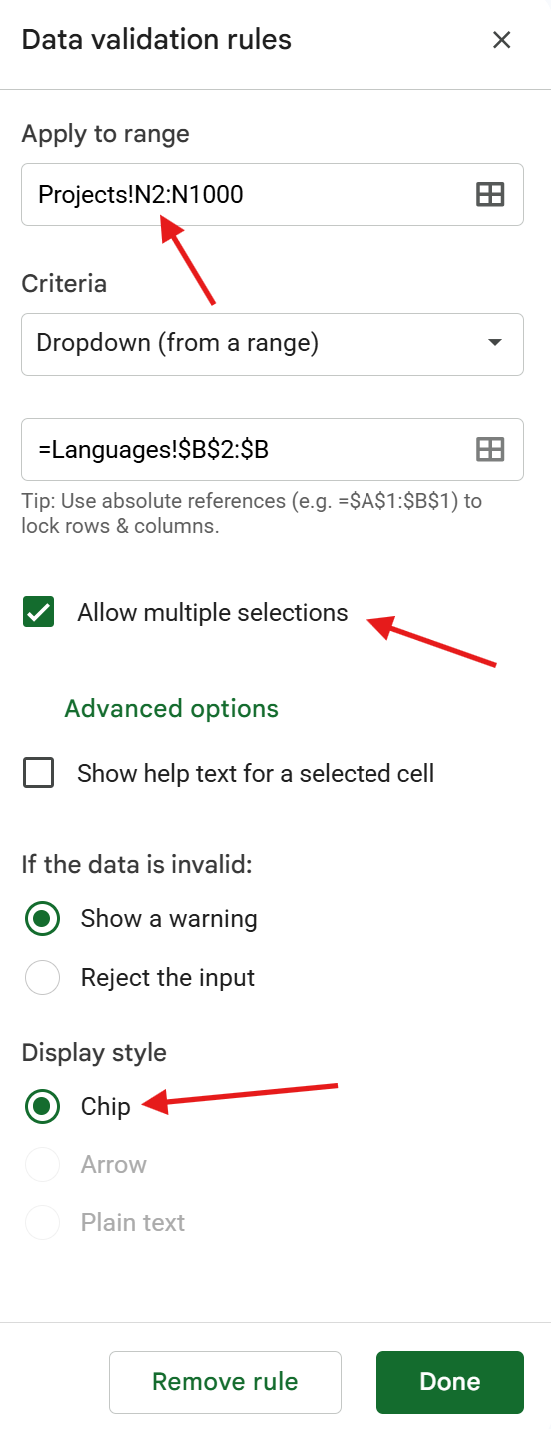
Some columns hold several values at once: a vendor works into ten languages, a project has three target languages. Google's API does not let us set this, so for now it is a manual one-time step. Until you do it, those cells show a red warning corner when they contain more than one value.
For each column in the list below:
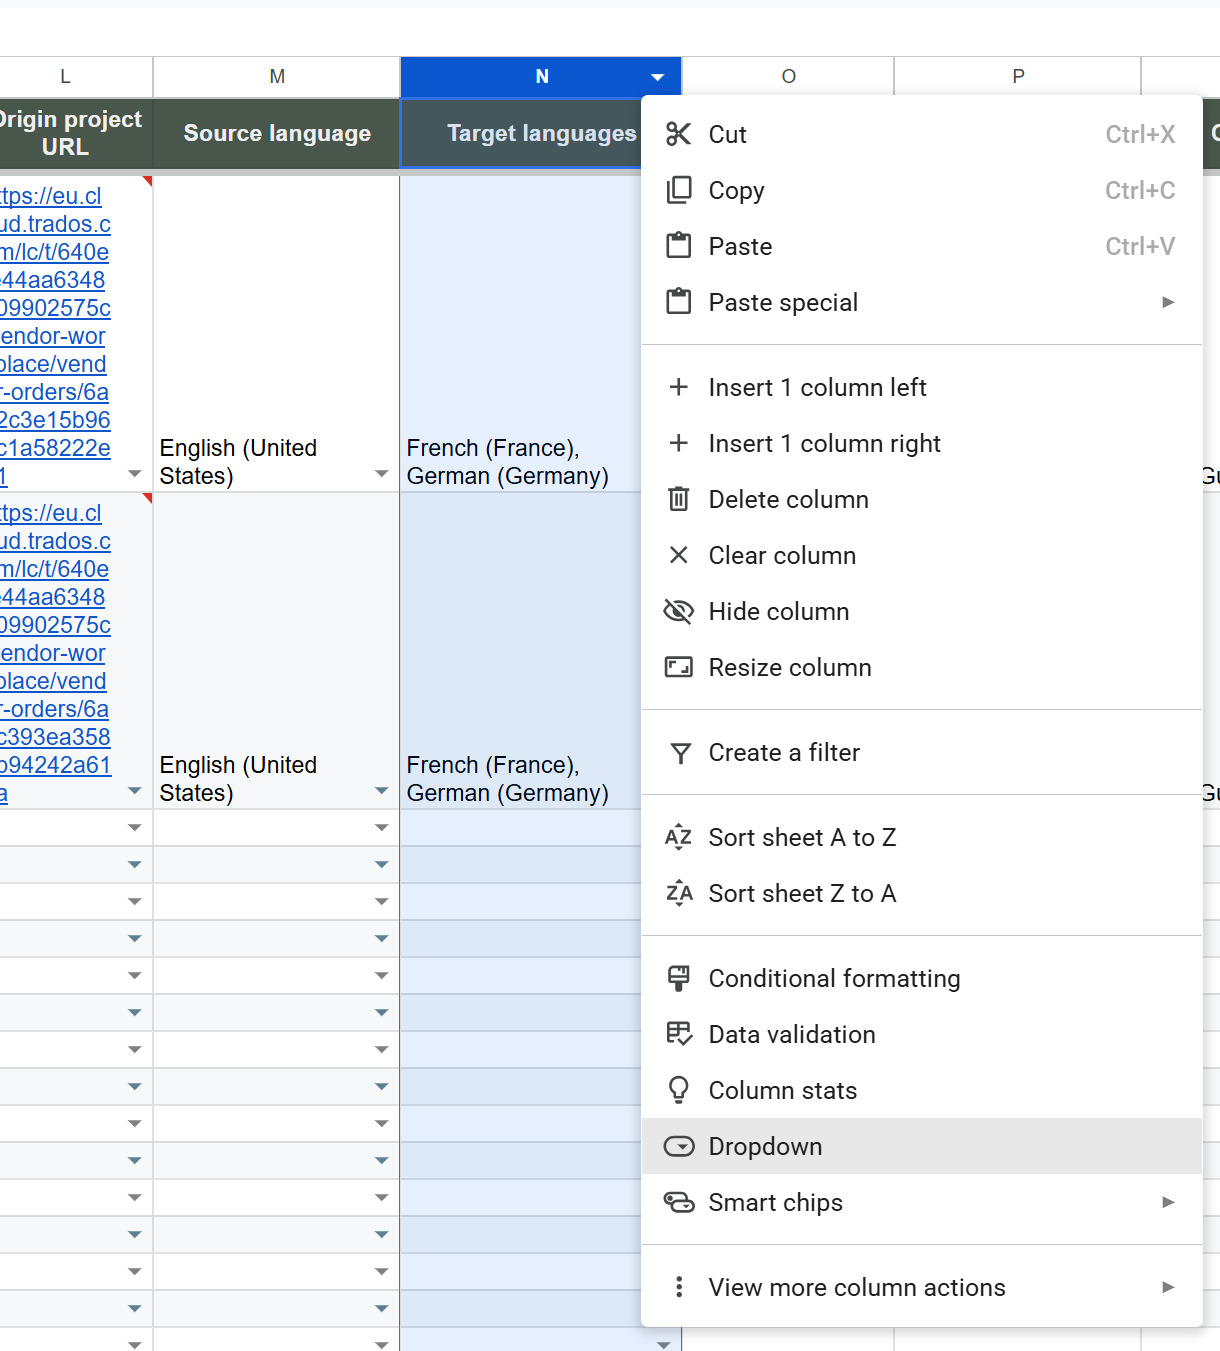
- Right-click the column header and choose Dropdown (or Data > Data validation, then the rule for that column).
- In the panel on the right, open Advanced options.
- Set Display style to Chip.
- Tick Allow multiple selections.
- Scroll back up to Apply to range and change the range so that it starts at the second row, for example Projects!J2:J instead of Projects!J:J, so the header is not included.
- Click Done.
Columns to configure:
| Sheet | Column |
|---|---|
| Projects | Target languages |
| Vendors | Supported source languages |
| Vendors | Supported target languages |
| Vendors | Supported work types |
| Price lists | Target languages |
These settings survive synchronization, so you will not have to repeat them.