
Setting up a new portal
Every portal that you or BeLazy set up is a specific deployment. At BeLazy, we use the Coolify service to run a server to deploy multiple portals. Running a portal does not require extensive resources: a standard 40 euro server can easily run 10-15 portals. While BeLazy runs in Microsoft Azure, for cost-effectiveness we host our portal servers at Hetzner.
Each deployment - which comes through a docker image, but can also be done differently - requires the setting of environment variables. These variables are safely stored, and cannot be accessed by the users. You need a BeLazy API key and a workspace ID for connecting the portal to a BeLazy workspace, and you need a client ID and client secret to configure single sign-on. There are also other configuration capabilities, for example whether you want to allow guest access or not.
What is most important is that each portal connects to one workspace in your BeLazy organization. Therefore the BeLazy-side configuration must happen in the workspace settings.
Basic customization
The easiest parts to change are the logo (please provide it in PNG format), the name of the portal, the logo that appears in the browser's header, and the color palette. If you would like to customize these, please provide your information - these can be customized in the code/deployment.
Configuring the workspace for the portal
If you do not have a BeLazy workspace created yet, create one by clicking on the Add button under Connections.
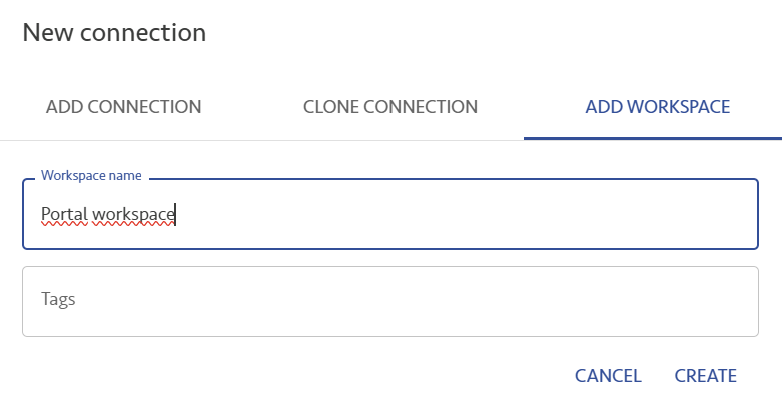
When the workspace is created, click on the pencil icon on its card:
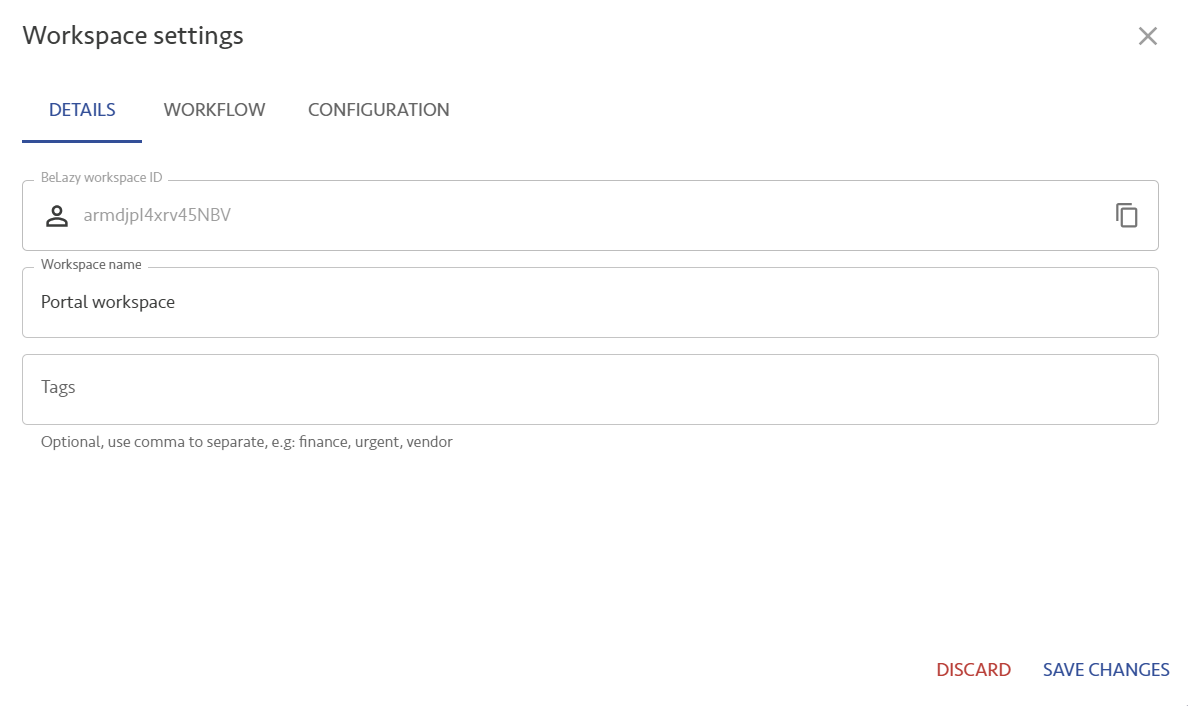
This is where you will be able to copy out the workspace ID from.
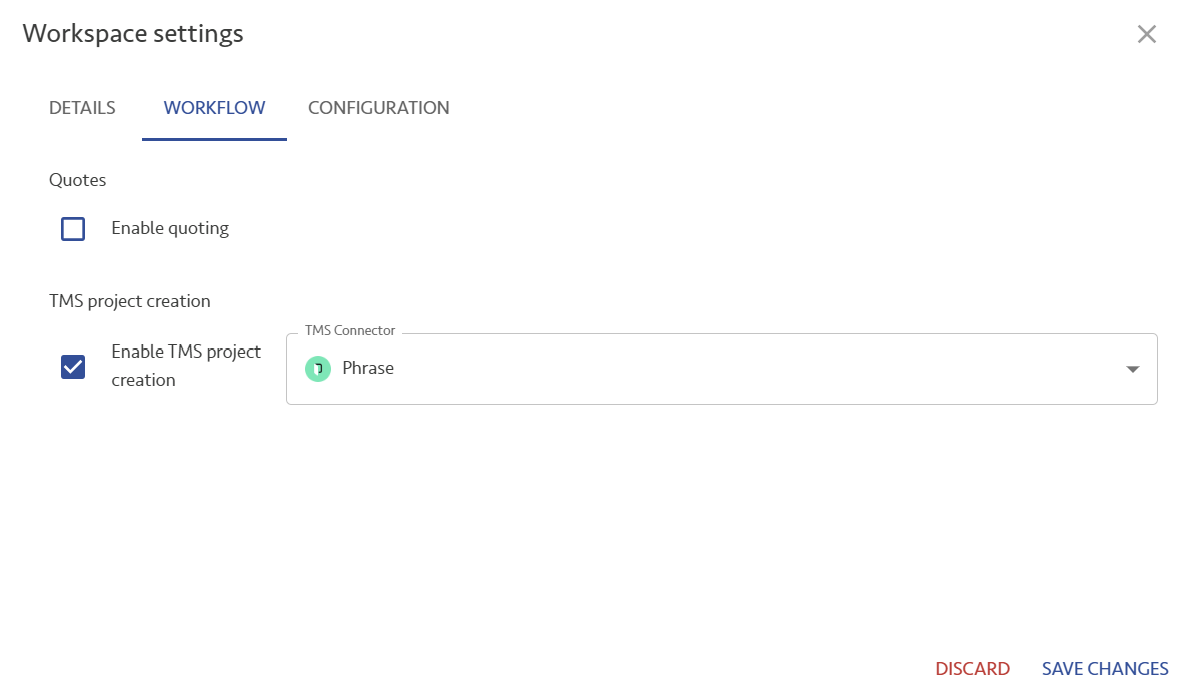
Now go to the Workflow tab, and enable TMS project creation with a readily configured TMS Integration Hub connection:
As the last step, we will move to the Configuration tab, and set up specific metadata for the portal:
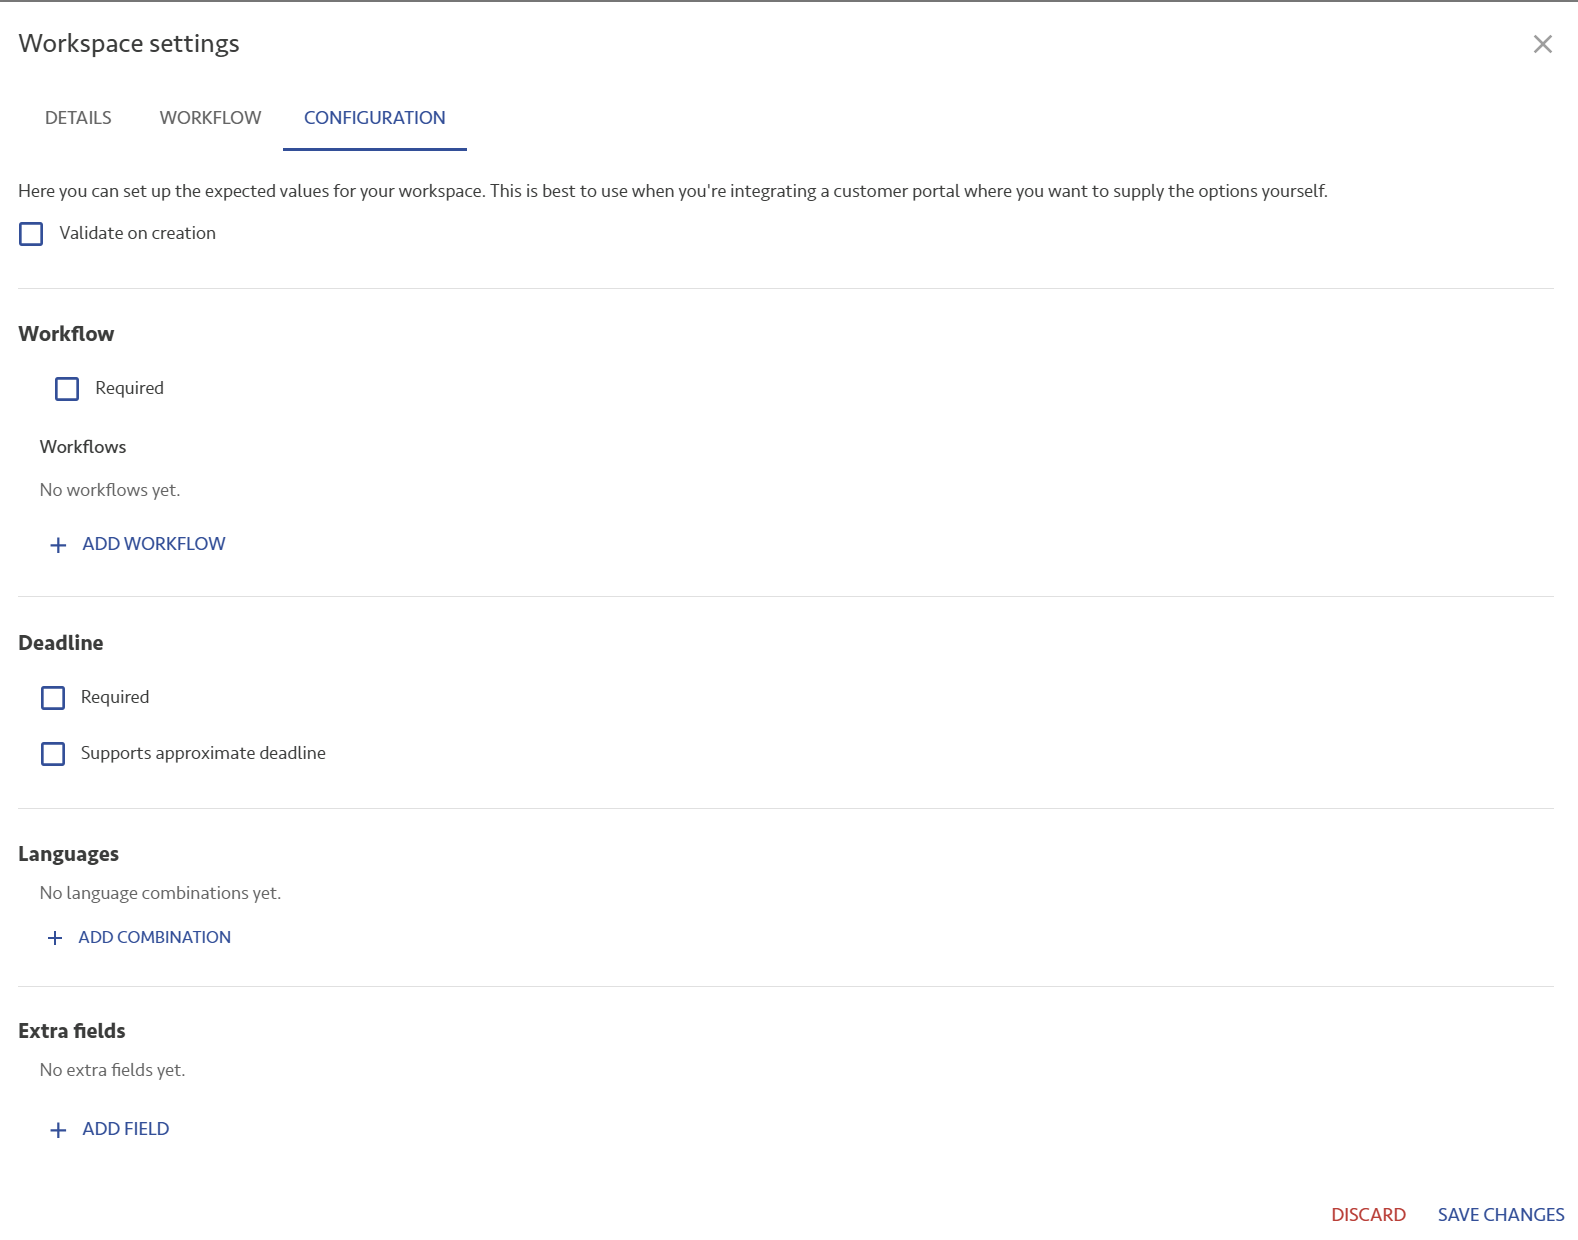
This is where you edit the workflows, the deadline requirements, the languages, and the extra fields. First, enter the workflows that you would like the customer to be able to select. Feel free to use any step names: you will do the mapping to your business management workflows anyway.
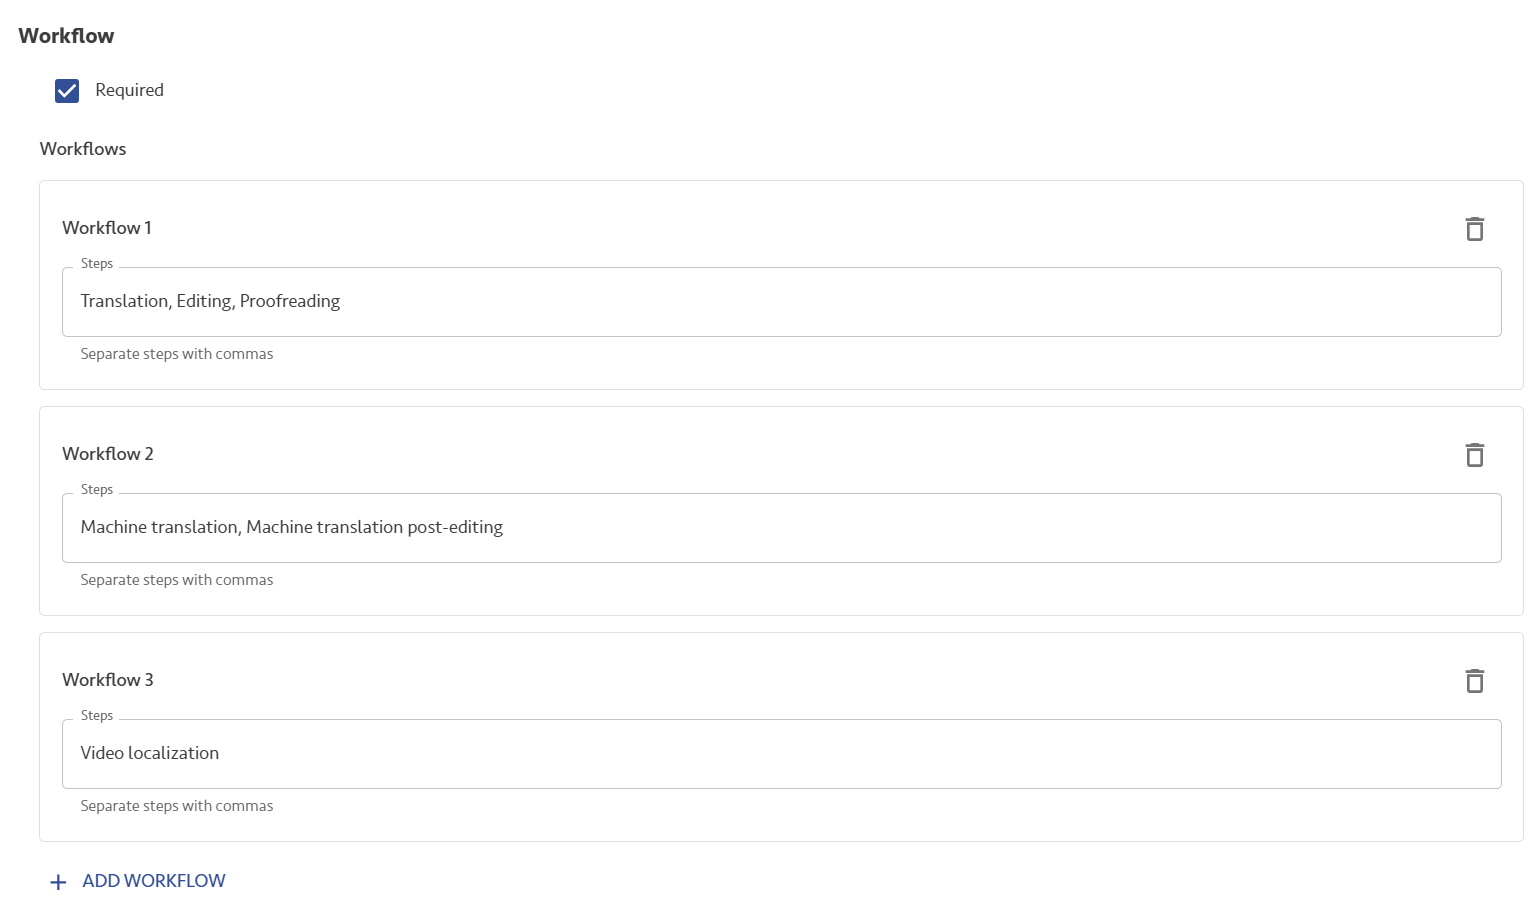
Set up whether you require deadlines and if there can only be strict deadlines or also informative deadlines. Add every language combination you want this workspace to support.
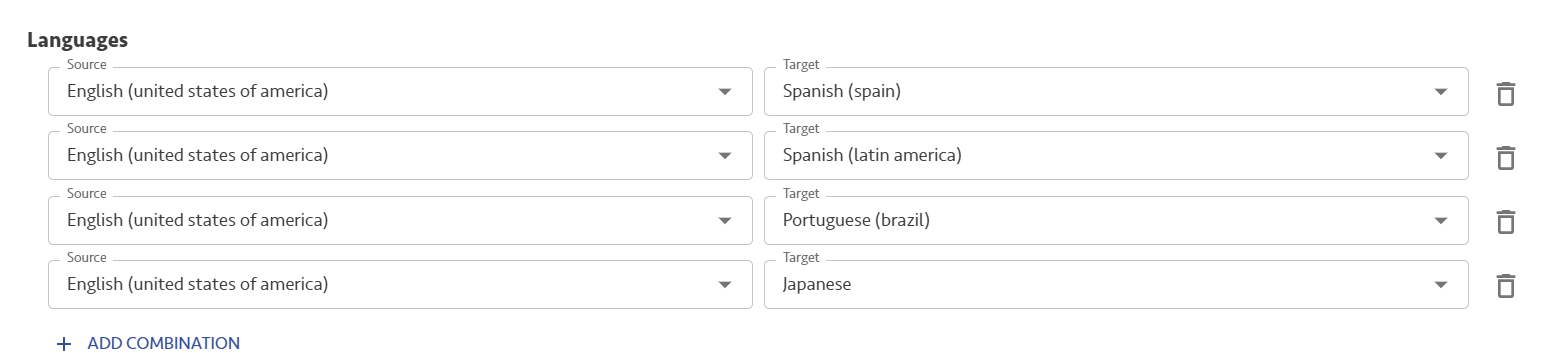
Important: the workspace can also be used for other API-based integrations, not only that of the BeLazy portal. If you enforce Validate on creation on the top of the page, only these languages will be allowed for anyone who is using the workspace, even if they are using the API.
Now add the possible fields, whether the fields are required, and the possible values for selector-type fields as extra fields:
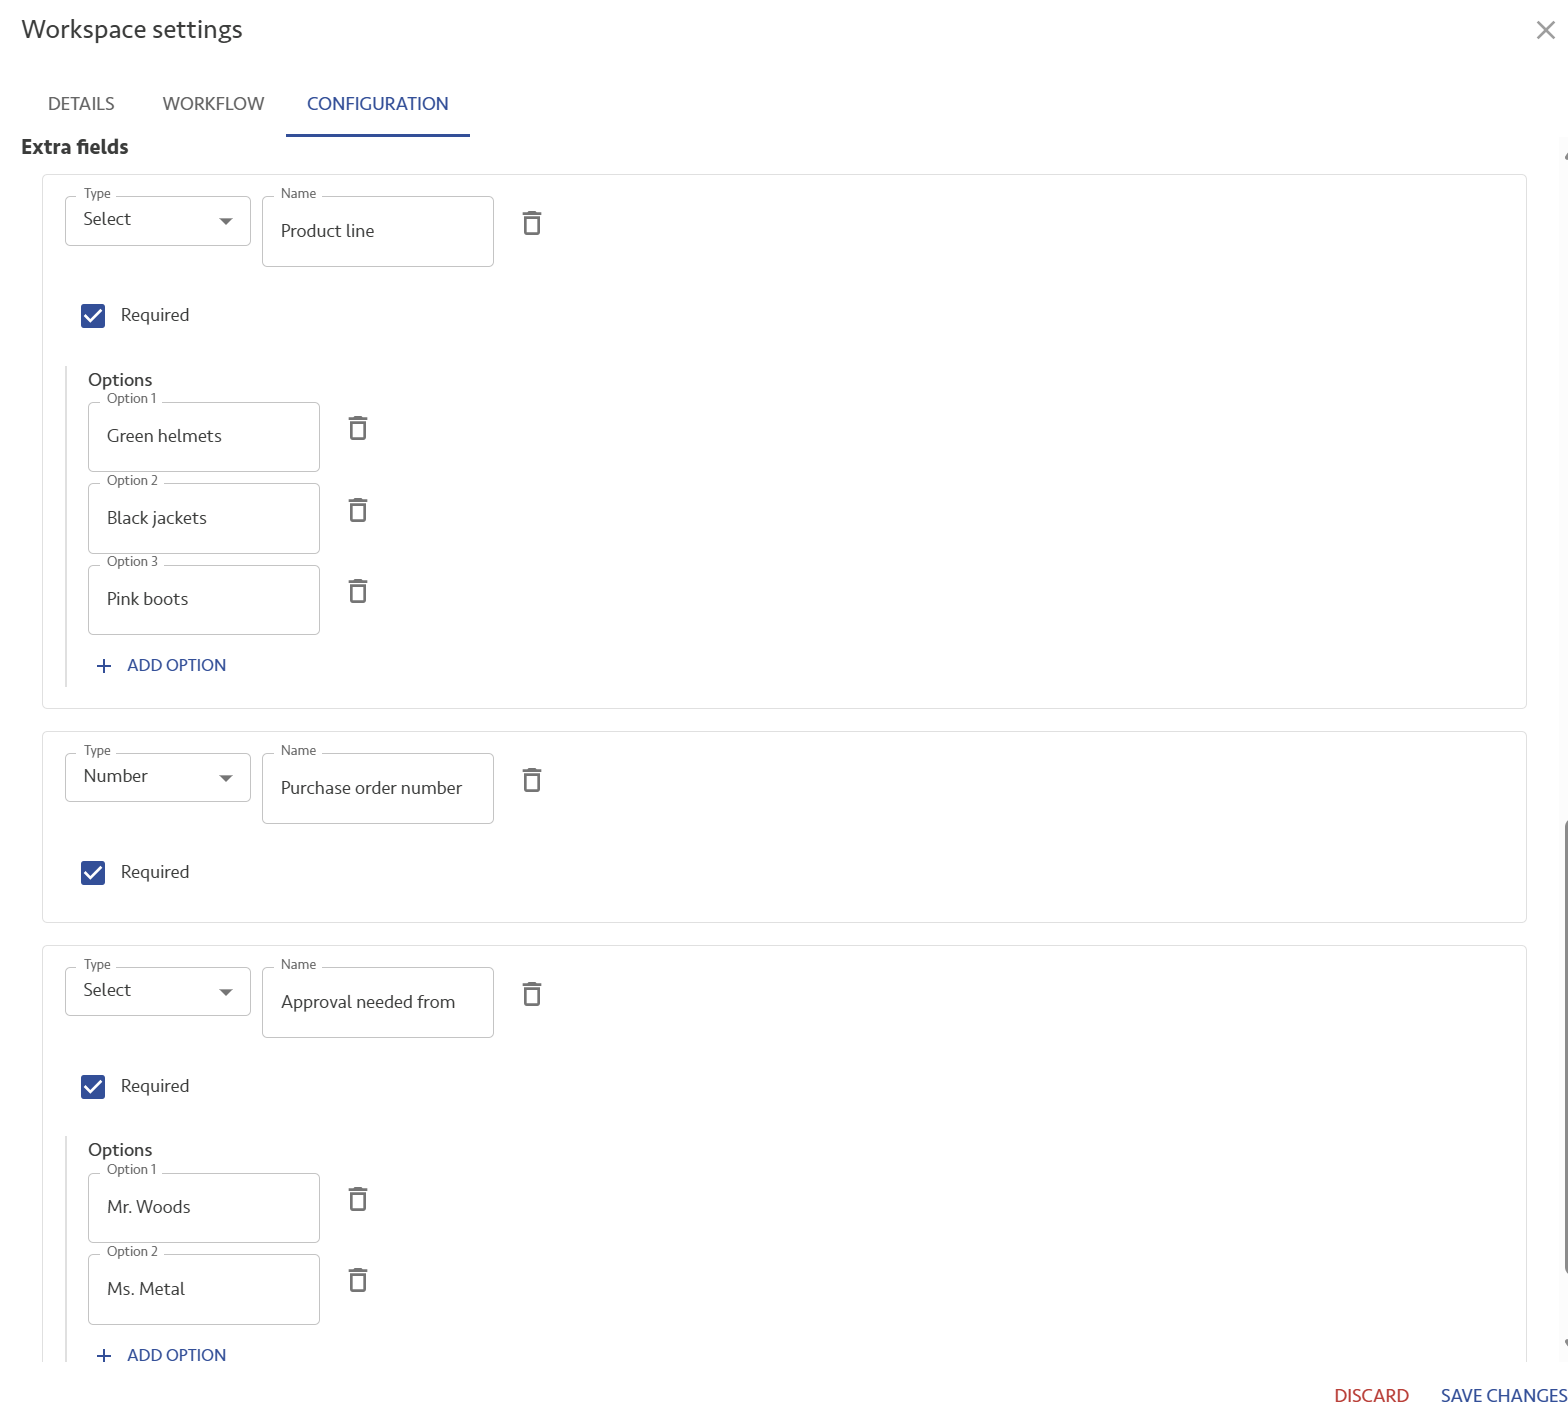
These fields will readily appear in the portal after the first synchronization. The workspace synchronizes with the portal every 2.5 minutes.
Read about how the portal works here.